Advertising disclosure: This site participates in the Amazon Services LLC Associates Program, an affiliate advertising program designed to provide a means to earn fees by linking to Amazon.com and affiliated sites.
Train-the-Trainer
Discover how to quickly design and deliver training programs with this LinkedIn Learning course.
Identify employee training needs
Create an effective training program on a small budget
Implement training that really works
Low-cost Webinar Equipment
You don’t need to break the bank to run a webinar that looks and sounds great.
Here are some affordable tools you can use, along with links to select products on Amazon. Pricing is subject to change, so please let me know if anything is out-of-date.
Click on a category to jump straight to those items or scroll down to browse.
Feel free to contact me if you get stuck or want some additional advice!
-Jeff
Audio Tools
You need a decent microphone so participants can hear you clearly.
Pro tip: I always use computer audio when I’m facilitating a webinar. Some webinar platforms give you the option of dialing in via telephone, but I’ve found that option doesn’t sound as good.
Many computers have built-in microphones, but they don’t sound great.
Basic Option: Earbuds (probably free)
There’s a good chance you have a pair of earbuds lying around somewhere. The audio from these sounds good enough for many situations, especially if you are hosting an internal webinar.

Better Option: Blue Yeti ($129)
I typically use a Blue Yeti microphone for webinars. It plugs directly into a USB port and is plug-and-play compatible with my Mac.
The sound is rich and clear, especially when compared to earbuds.
Despite the name, the microphone comes in a variety of colors. (Blue is the name of the company that makes the Yeti.) Mine happens to be blue because I like it.

I’ve moved the microphone in front of my screen so you can see it, but I usually tuck it off to the left of my monitor. This degrades the audio a little since the microphone sounds best when it’s directly in front of you. However, I’ve found that moving it to the side hides it from view without hurting the audio too much.
The Yeti comes with its own stand. If you really wanted to get fancy, you can get an inexpensive desktop mount to position your microphone above your camera and out of site.
The one accessory I’ve added is a DragonPad Pop Filter that helps remove popping and lisping sounds when you’re recording.
Pro-tip: you’ll need separate speakers if you use a stand-alone microphone like the Yeti. I get away with using my computer speaker by making sure the microphone is positioned in front of my speakers and set to cardioid mode. The microphone only records sounds in front of it when it’s in cardioid mode.
Great Option: Sennheiser Headset & Microphone ($307.41)
The Sennheiser SDW 5066 bluetooth headset and microphone is my go-to option when I really want the audio to sound great.
The microphone does an amazing job of cancelling out external noises, so webinar participants don’t notice when my neighbor is mowing his lawn. The headset is comfortable with great audio output, so it’s also a good option when you need to hear others.

I also use my Sennheiser headset for making calls and recording podcast interviews, so it’s a very versatile tool to have.
There are a couple of minor drawbacks:
Some people, myself included, think a headset looks clunky when you’re on video.
A bluetooth connection can be unreliable on some computers.
Video Tools
Stop here if you don’t plan to appear on video during your webinar.
I often like to appear on video at the start of a webinar to make it more personal. I’ll also use a minimized video screen or re-start my video during the question and answer segment.
Smaller training classes with less than 10 participants can also work well on video, since you can see each other while having class discussions.
Basic Option: Built-in Webcam (free)
Many computers have a built-in webcam. This is a great low-cost option since you already have the equipment.

There are two drawbacks here.
The first is the video from built-in webcams is often lower resolution than you want it to be. You will really notice this if the lighting isn’t great or you want your video image to fill the entire screen.
The second is if you use an external monitor, like I do. I have to open my laptop to turn on the built-in webcam, which means I have to use a much smaller screen.
Better Option: Logitech C920s ($199)
The Logitech C920s webcam shoots terrific video and has a number of great features:
It quickly self-adapts to the available light.
The handy clip easily attaches to the top of your monitor or laptop.
An integrated privacy shutter allows you to manually turn off your video.
This webcam also includes an integrated microphone that’s a step-up from your built-in computer microphone.

Lighting Tools
Good lighting is the key to making yourself look great on video. There are a few basic principles to help you get it right:
The primary light source should be aimed directly at you.
Soft light, such as natural light from a window, works best.
Light from the back or the side can create glares or shadows.
Basic Option: Lamps and Windows (free)
You can often get great lighting for your webinar just by setting up in the right place. Facing a window with soft, natural light is a great options.
If that’s not available, you can try positioning a desk lamp just behind and above your camera. Here’s a short, helpful video that explains how to do that:
Better Option: Lume Cub Air ($69.95)
I’ve just started using a Lume Cub Air, and I love it!

It’s a small light that mounts via suction cup to the back of my laptop. (Unfortunately, it doesn’t stick well to my monitor.) The light offers the perfect amount of illumination to make videos look great. It also sticks to my phone or iPad.
The best thing about it is it’s extremely portable. Here’s what my full set-up looks like:

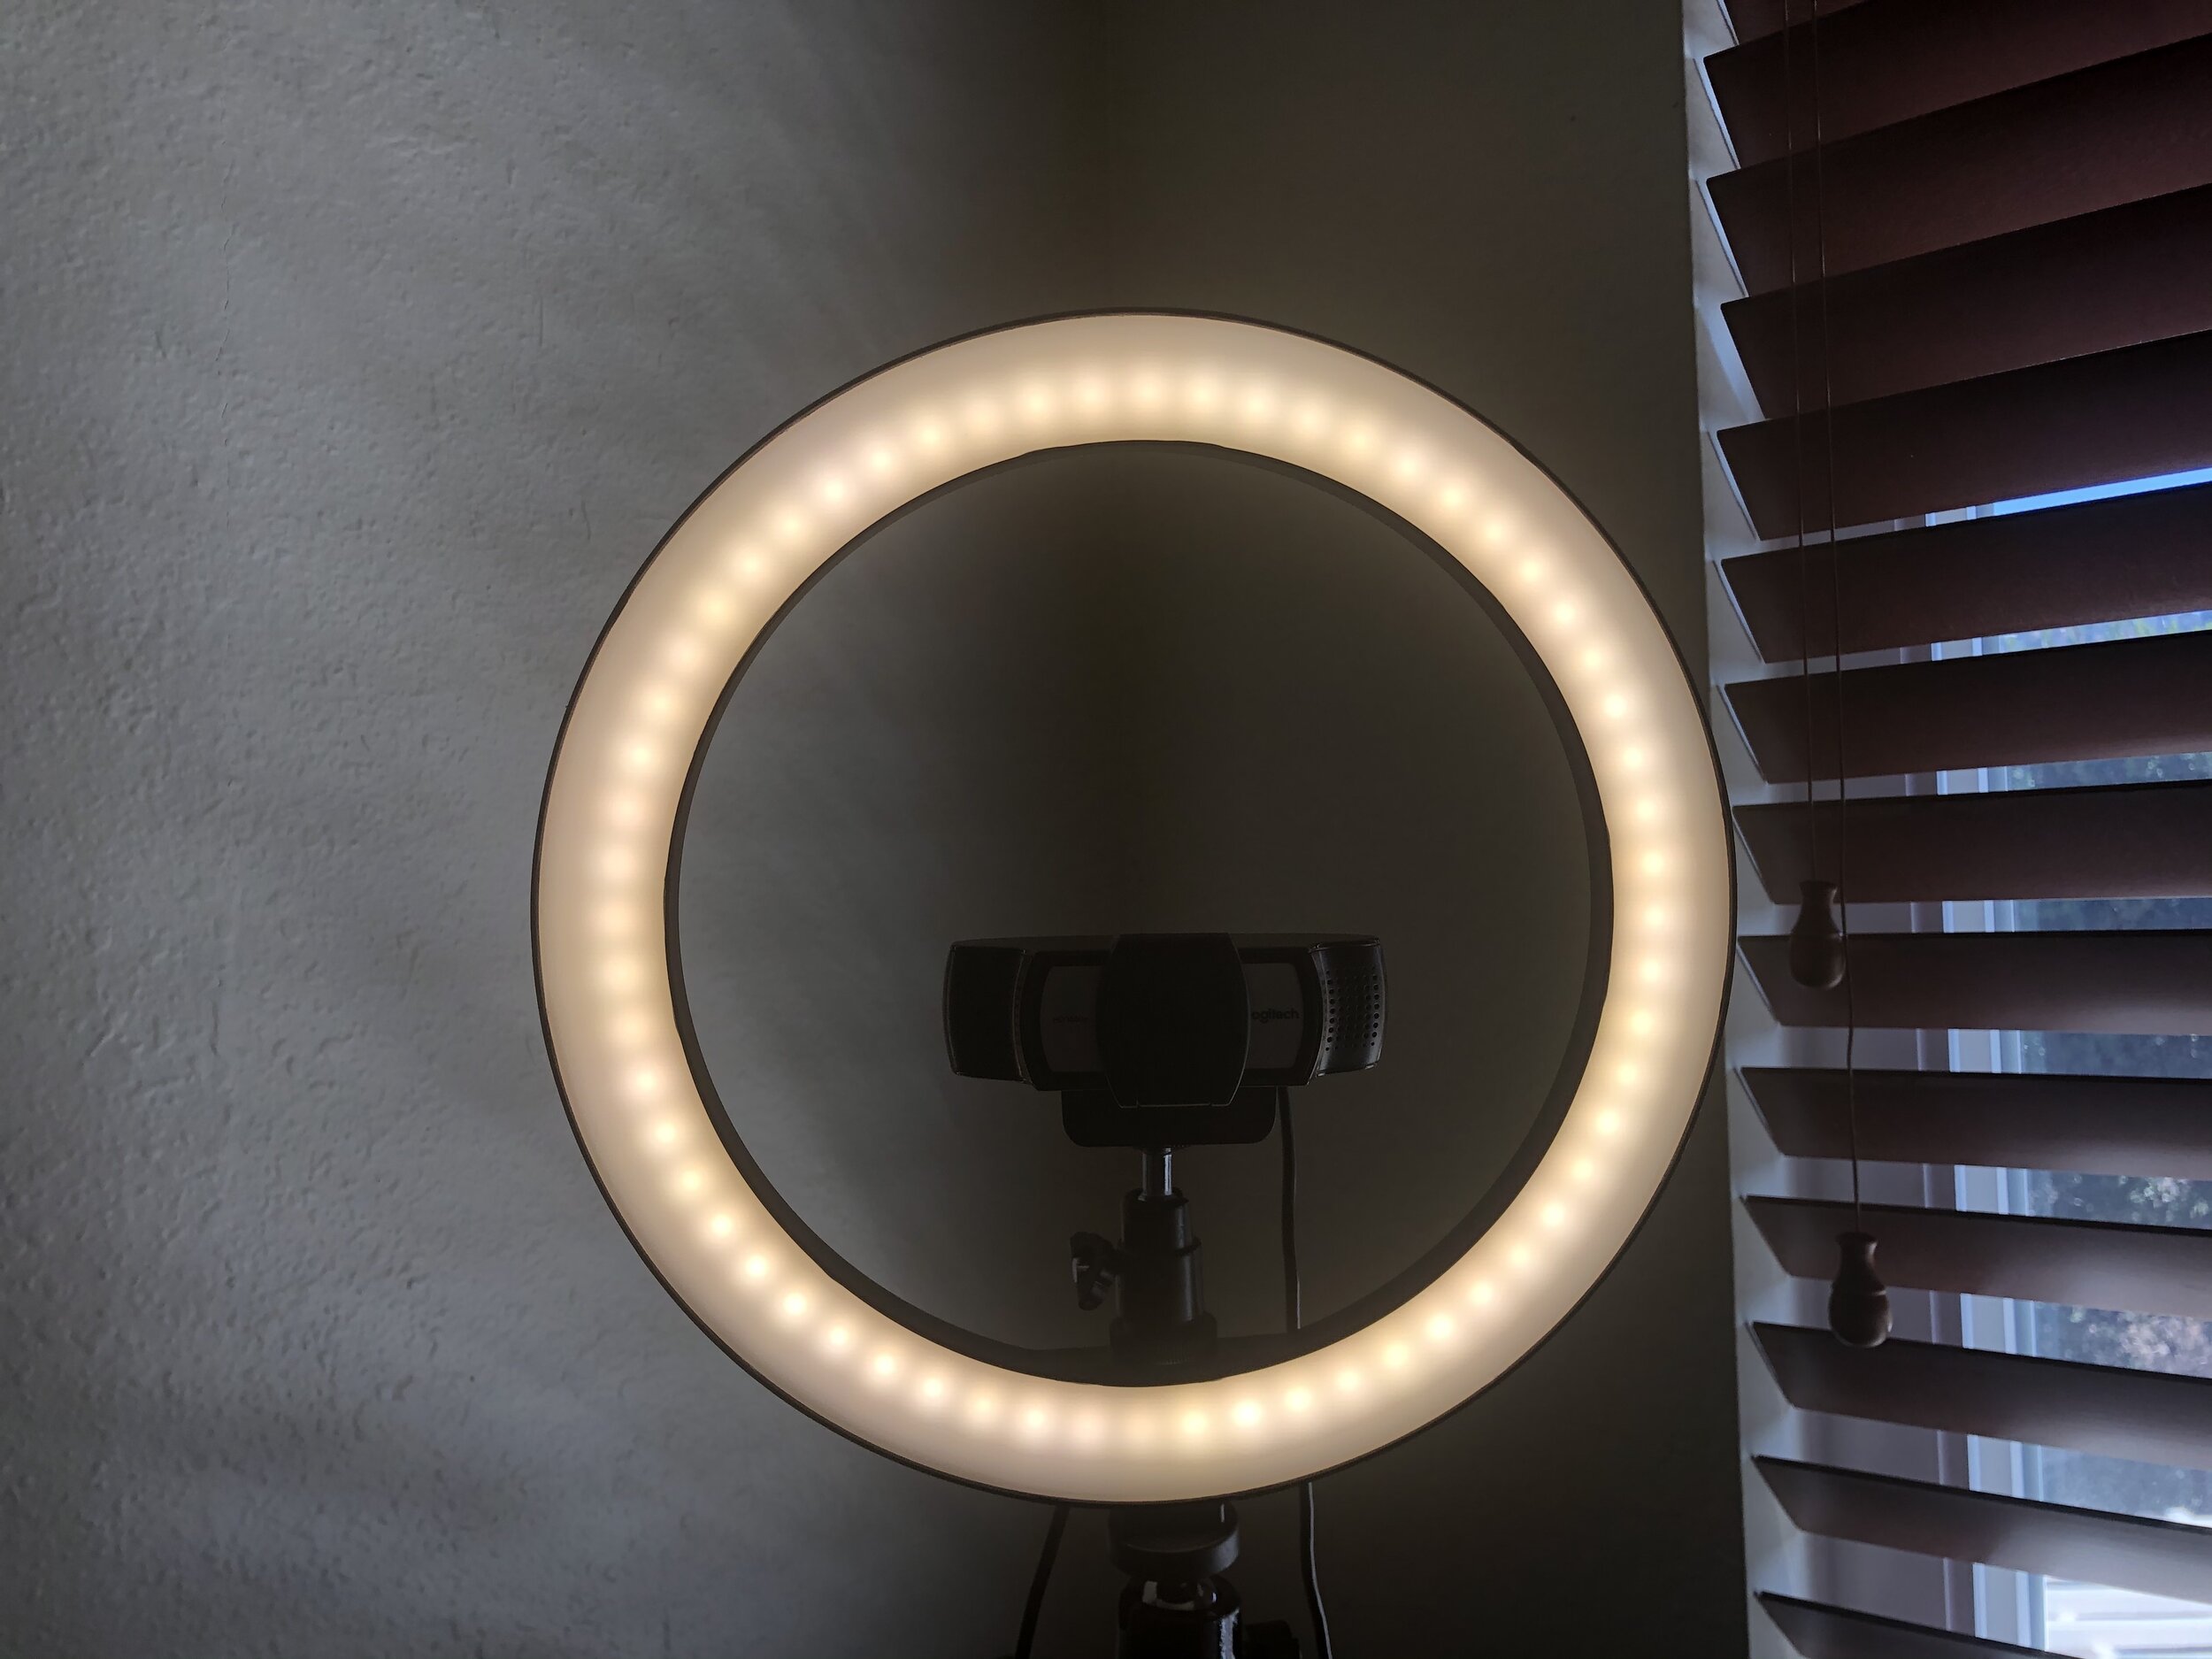
Best Option: AXIPI Ring Light ($22.99)
This inexpensive ring light provides terrific lighting and is even more affordable than the Lume Cube.
There are a few features I really like about it:
Adjustable brightness and light temperature.
Included tripod elevates the light to different heights.
I can mount my webcam in the middle of the ring.
Switching to the ring light has improved my video image quality. It’s allowed me to go back to using my full monitor since I mount the light on a tripod behind the monitor itself.